

How To Refresh
& Customise
Sneakers With
Leather Dyes
& Paint
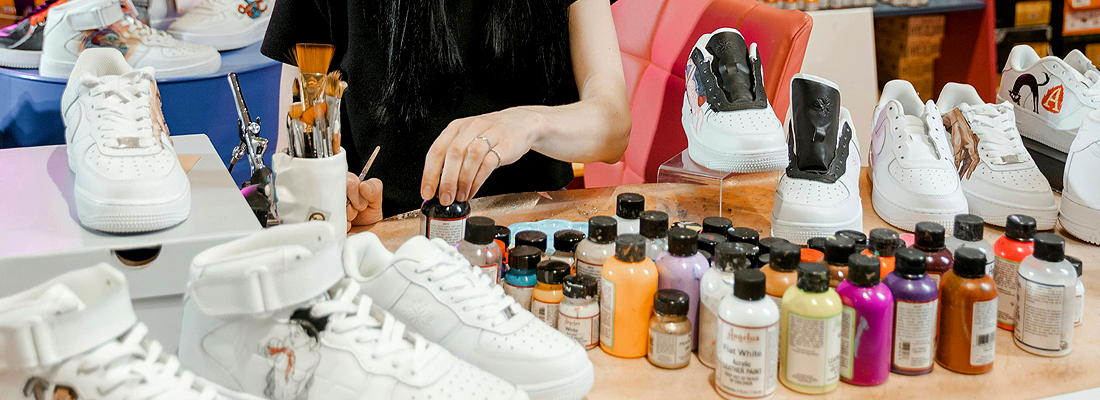
Sneakers have evolved beyond simple footwear, and are now a vital part of personal style and self-expression for a large proportion of the population. However, over time, even our favourite pairs can start to show signs of wear or lose their appeal.
Instead of replacing them, customising sneakers with leather dyes and paints offers a creative way to breathe new life into your favourite kicks. Whether you're looking to refresh a well-loved pair or completely transform their look, the possibilities are endless.
In this guide, we’ll explore how to use leather paints and dyes to create unique, personalised designs. With the right techniques and tools, you can achieve professional results and turn your sneakers into something truly one-of-a-kind.
Understanding Leather Paint & Dye
Leather paints and dyes are specifically designed to bond with the flexible surface of shoes, making them the ideal choice for customisation projects. Unlike regular paints, which may crack or peel, leather paint is made to move with the material, ensuring a smooth and durable finish. This flexibility is what makes leather paints perfect for use on sneakers, where wear and movement are constant.
With leather paint, you have the power to restore the original colour of your shoes, cover up scuffs and scratches, or create entirely new designs. The versatility of leather dyes means you can achieve anything from subtle colour changes to bold, eye-catching patterns. Whether you're reviving a worn-out pair or turning your sneakers into a personalised work of art, leather paint offers endless possibilities for creative expression.
The Popularity of Customised Sneakers
Customised sneakers have taken the world by storm, becoming a popular trend in both street fashion and high fashion. Whether it’s adding a personal touch to a new release, or creating one-of-a-kind statement shoes from a favourite model, customisation allows for endless creative expression. It’s no longer just about refreshing old sneakers; customisation has become a way to design footwear that reflects your personal style and individuality.
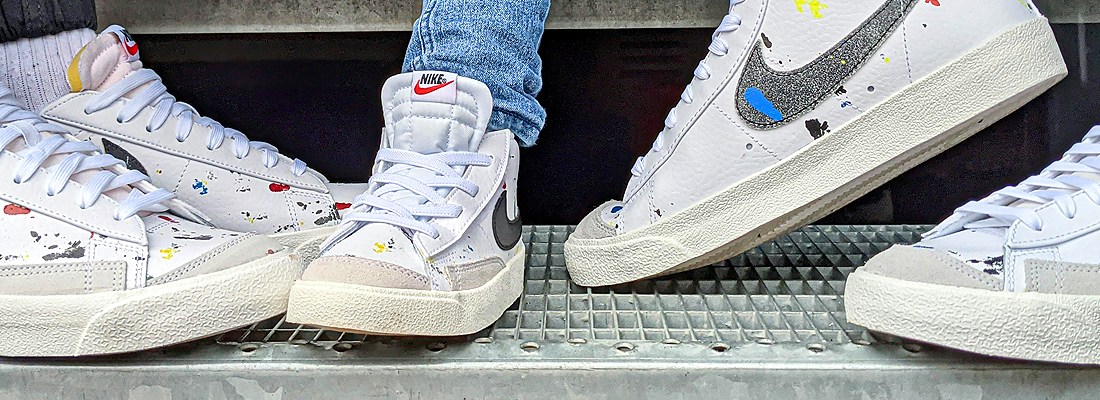
Through customisation, you can achieve a variety of looks, from subtle enhancements to bold, artistic transformations. Sneakers are often transformed with unique colour schemes, intricate patterns, or even hand-painted artwork. The growing popularity of sneaker customisation has made it an appealing option for those looking to create truly unique, wearable art.
Inspiration for Shoe Customisation
The possibilities for customising your sneakers are vast, and there are plenty of ways to get creative with leather paints and dyes.
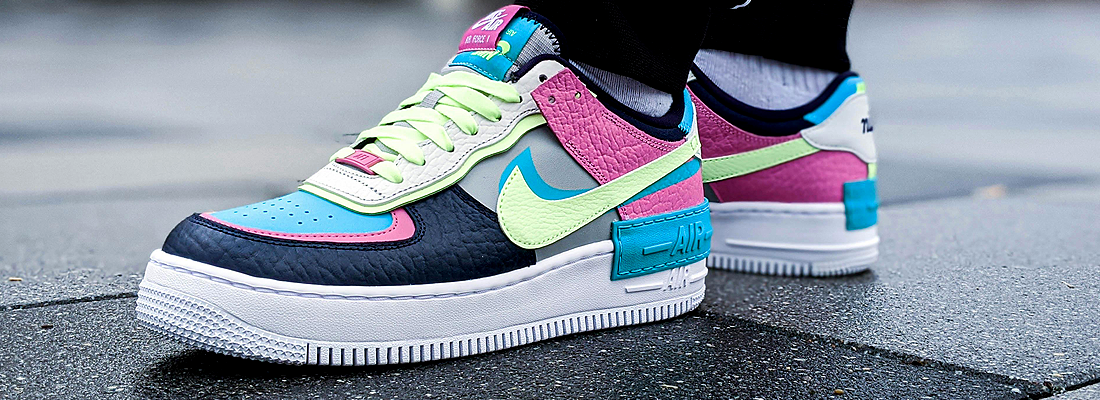
Graphics & Colour Blocking
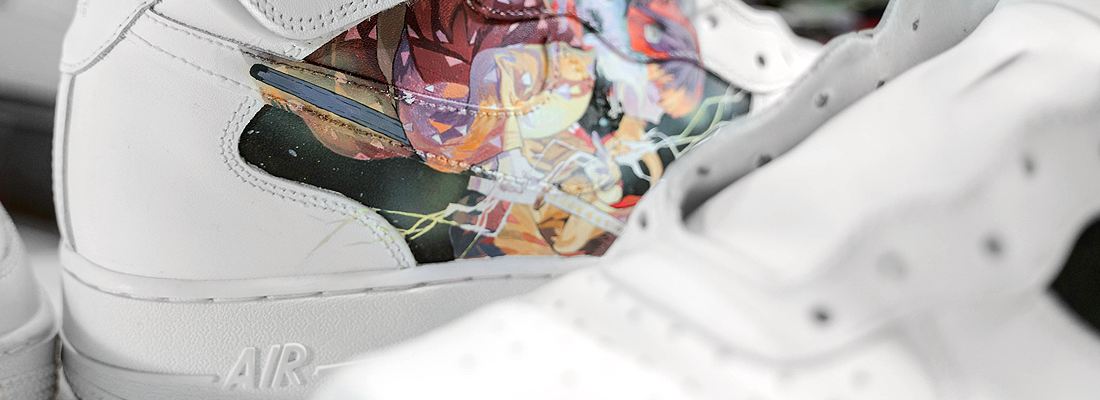
Creating unique graphic designs is a popular option, where you can use stencils or freehand techniques to add intricate patterns, shapes, or even your favourite characters. Colour block designs are another possibility, combining contrasting shades for a striking, modern look that stands out. If you prefer something more classic, monochrome designs in neutral tones can give your sneakers a clean, fresh appearance.
Metallic & Ombre Effects
For those who want to make a statement, try experimenting with metallic finishes or ombre effects that transition from one colour to another. You can even incorporate your favourite logos or emblems to give your shoes a personalised, branded touch.
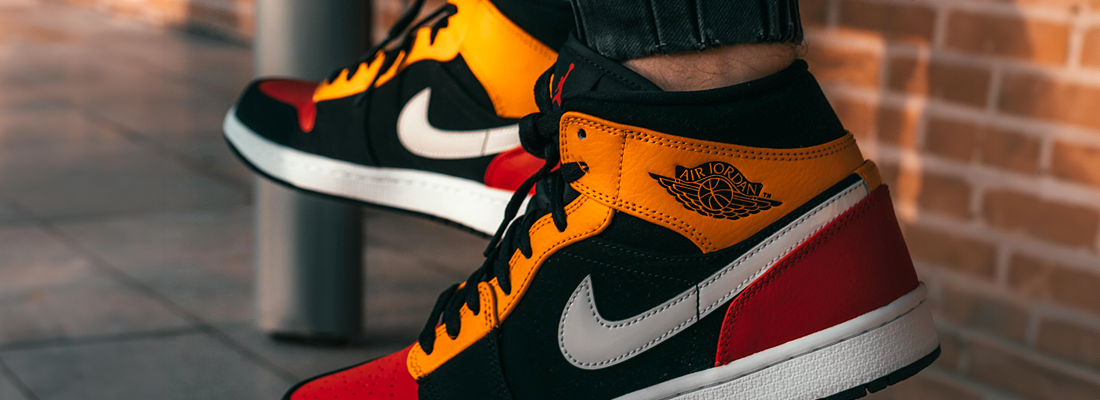
Vintage & Classic Designs
For a more subtle update, some customisers like to use dyes or paints to give their sneakers an aged effect. This is the perfect way to get a pair of sneakers that look like deadstocks that have been stashed away for years and unboxed for the first time. Alternatively, iconic colourways from the past can be reimagined or combined with newer models for something unique yet with a nod to the legacy of sneaker culture.
Nature & Patterns
If you’re inspired by nature, consider adding floral patterns or animal prints for a unique twist. Alternatively you might want to incorporate your own designs such as stripes, waves or geometric patterns for a personalised touch.
The beauty of customisation is that you have complete control over the design, so don’t be afraid to mix styles, experiment with textures, or try something entirely new.
Preparing Your Shoes for Painting
Before diving into the creative process, it’s essential to properly prepare your sneakers for painting. This step ensures that the leather paint or dye adheres smoothly and lasts longer without cracking or peeling.
1. Clean the Surface
Start by thoroughly cleaning your sneakers to remove dirt, oils, and any previous coatings. Use a leather cleaner or a mild soap and water solution to ensure the surface is spotless. This step is crucial for the paint to bond properly with the material.
2. Remove Old Paint or Finish
If you're working with shoes that have old paint or a finish that needs to be removed, you’ll want to strip it away carefully. Using a deglazer or acetone will help break down the existing finish without damaging the leather. Be sure to work in a well-ventilated area when using these products.
3. Prep the Surface
Once your shoes are clean and stripped of any old paint, it’s time to prepare the surface. Lightly sand the area if needed, especially if the leather is very smooth, to give the paint something to grip onto. Make sure the surface is dry before moving on to the painting process.
Proper preparation sets the foundation for a flawless paint job and ensures that the final result looks professional and lasts longer.
Choosing Your Paint & Colour
Selecting the right paint and colour is key to achieving the look you want for your customised sneakers. There’s a wide range of colours and finishes available, from matte to metallic, so it’s important to choose what suits your vision.
When picking your colours, consider whether you’re looking for a subtle refresh or a bold transformation. Neutral colours work well for restoring a classic look, while brighter tones or unique combinations can make your sneakers really stand out. If you're going for something eye-catching, mixing colours or adding metallic accents can give your shoes a creative edge.
Angelus Leather Paints
If you're looking to refresh your sneakers, Angelus Leather Paint is an excellent choice for restoring their original look. With a wide range of neutral and classic colours, Angelus provides the perfect solution for touching up faded areas or covering scuffs. It’s designed to bond with the leather, ensuring a smooth, durable finish that lasts through everyday wear.
Angelus products are also great for more extensive customisation as well, whether you want colours and designs to complement or contrast with your existing shoe. These products are incredibly popular amongst experienced sneaker customisers, offering high quality application and long lasting results.
Jacquard Leather Paints
If you're looking to add bold, vibrant colours to your sneakers, Jacquard paint products are an excellent choice. Their versatile range includes a specifically developer Sneaker Series that is designed to provide smooth, opaque coverage on leather and other materials, making it perfect for achieving clean, vivid designs. It works exceptionally well on darker surfaces, where it can deliver bright, standout colours without losing its intensity.
For more intricate designs, you can mix Neopaque Paints to create custom shades, giving you even more control over your sneaker customisation. This makes it a fantastic option for those who want to explore different colour combinations or add unique touches to their shoes.
Montana Spray Paint & Effects
Montana produces spray paints in a wide range of colour options, including some superb effect sprays that can take your sneaker customisation to another level. While Montana paints are formulated to a high standard and suitable for a wide range of materials, including leather, we’d tend to recommend the leather specific paints from Angelus and Jacquard for larger leather surfaces to avoid cracking over time due to movement and flexing of the shoe.
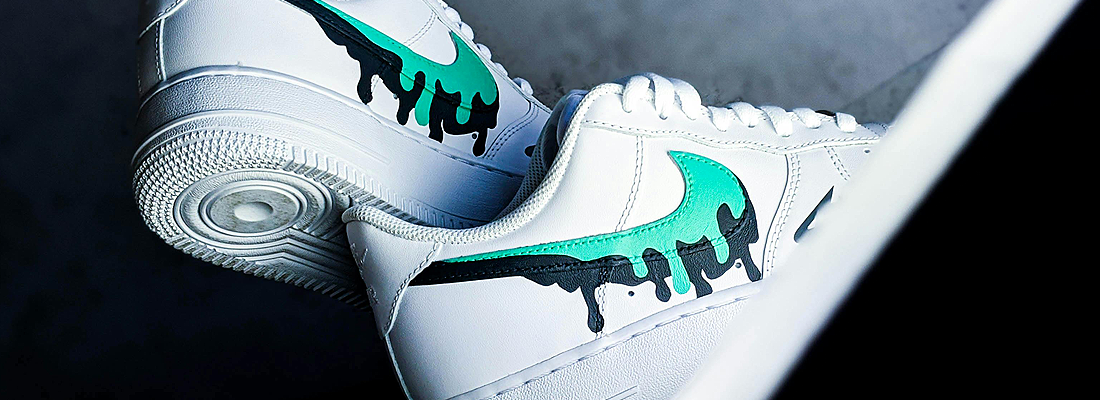
Where Montana sprays come into their own though, is the effects and finishing touches that they let you add to your sneakers. From paint drips and surface hazes, to UV glow elements and much more, this range is well worth a look if you want to incorporate some extra creative elements within your design.
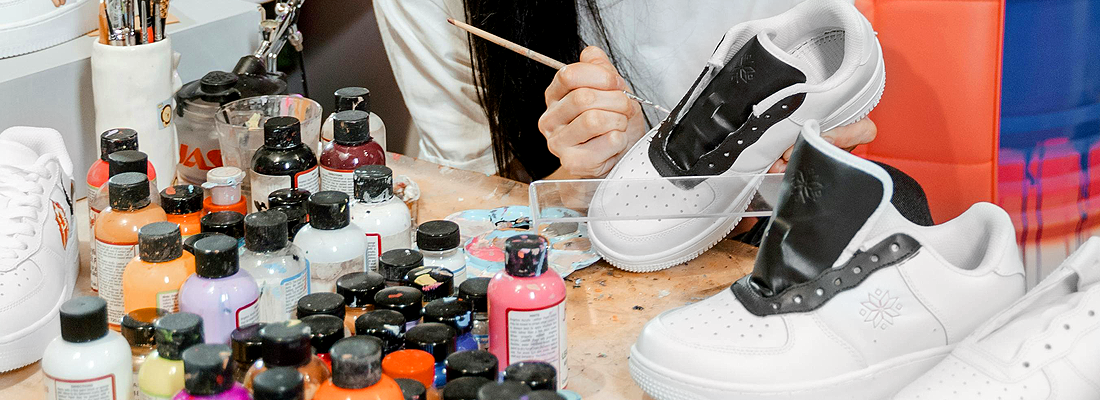
Applying Leather Paint & Dye To Sneakers
Once your sneakers are prepped and you’ve chosen your colours, it’s time to apply the paint or dye. This process requires patience and attention to detail to ensure a smooth, professional finish.
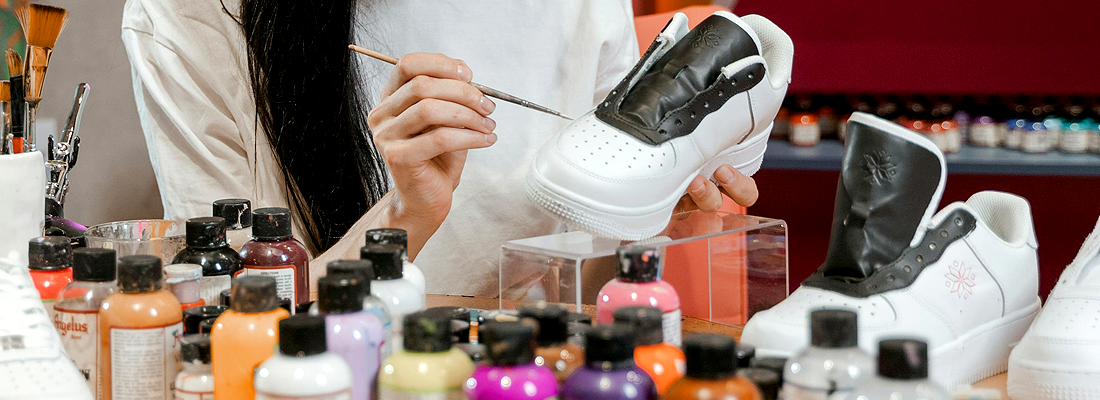
1. Gather Your Tools
Make sure you have the right tools on hand before you start. You’ll need a selection of brushes (fine-tipped for details and broader ones for larger areas), paint trays, masking tape to protect areas you don’t want to paint, and a sponge or airbrush if you prefer a more even application.
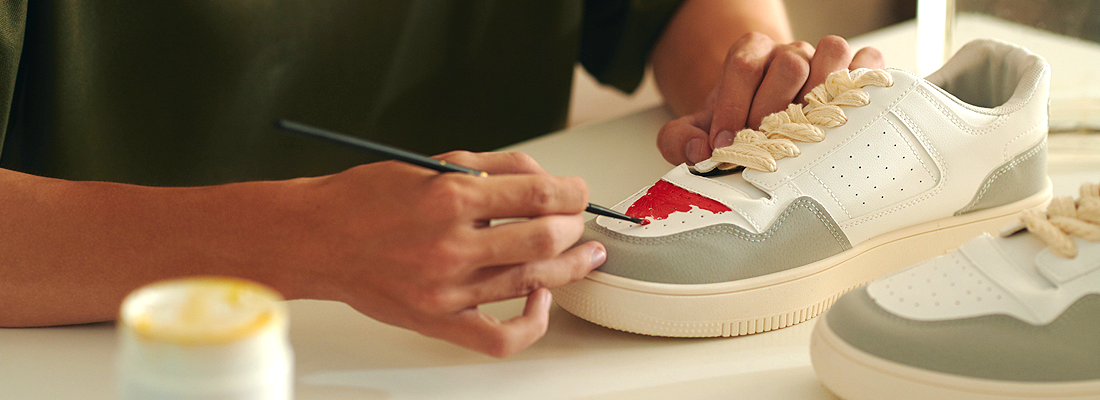
2. Apply Thin Layers
When painting, it’s best to apply thin layers, allowing each one to dry completely before applying the next. This ensures a smooth finish and prevents the paint from cracking or peeling over time. If you're using dye, the process is similar, though dye tends to penetrate more deeply into the leather, so fewer coats may be needed.
3. Drying Time
Let each layer dry fully to avoid smudging or uneven textures. Depending on the product you're using, drying times can vary, so check the instructions and give your sneakers enough time to set.
4. Check for Even Coating
After a few layers, check for any uneven spots or areas that need touching up. This is especially important if you're using a bold or light colour that requires full coverage.
Application Techniques for Different Leather Types
Not all leather is the same, so the way you apply paint or dye may vary depending on the material of your sneakers. It’s important to adapt your technique to achieve the best possible results, whether you’re working with smooth leather or more delicate materials like suede and nubuck.
Smooth Leather
Smooth leather is the most common type used in sneakers and is generally easier to work with. When applying paint, use thin, even layers and let each layer dry before adding the next. For dye, ensure it’s applied evenly with a brush or sponge to avoid streaks. Smooth leather also responds well to airbrush techniques, giving a clean and even finish.
Suede and Nubuck
These materials are softer and more porous, so you’ll want to be more cautious. Rather than using thick coats of paint, opt for dyes, as they will penetrate the surface more effectively without stiffening the material. A sponge is ideal for applying dye on suede and nubuck, allowing for a gentle, even application. Keep in mind that suede and nubuck can be sensitive, so always test a small area first.
Patent Leather
Patent leather has a glossy, coated finish that can be tricky to paint. Before starting, make sure to use a deglazer or acetone to remove the top coat so the paint adheres properly. For best results, use an airbrush or very fine brushes to maintain the smooth, shiny finish of the leather.
Finishing Touches

After applying your paint or dye and achieving the look you want, the final step is sealing and protecting your work to ensure it lasts. A proper finish not only enhances the look but also protects your sneakers from wear and tear, weather, and general use.
Apply a Sealer
Once your sneakers are completely dry, apply a clear sealant to lock in the paint or dye. This step is crucial for maintaining the durability of the design. There are different types of sealers available, including matte, satin, and gloss finishes, depending on the look you’re going for. Use a soft brush or sponge to apply an even coat, and be sure to let it dry thoroughly.
Waterproofing
If your sneakers are exposed to the elements, consider adding a waterproofing spray to protect the paint or dye from water damage. This is especially important for custom designs on suede or nubuck, which are more susceptible to moisture.
Buffing and Polishing
For smooth leather sneakers, a final buffing or light polish can give the shoes an extra shine and professional finish. This is an optional step but can elevate the overall look.
Maintenance & Care Post-Painting
After customising your sneakers, proper maintenance is key to preserving the fresh look and ensuring the paint or dye lasts as long as possible. Here are some tips to keep your newly customised shoes looking their best.
Regular Cleaning
To maintain the vibrant look of your sneakers, it’s important to clean them regularly. Use a soft, damp cloth to wipe off dirt and dust. Avoid using harsh chemicals or soaps, as they may damage the paint or dye. For suede or nubuck, use a specialised suede brush to remove any surface dirt without damaging the material.
Avoid Excessive Moisture
Water can be damaging to custom designs, especially if you haven’t applied a waterproofing spray. Try to avoid wearing your customised sneakers in heavy rain or wet conditions. If they do get wet, allow them to dry naturally, and try to avoid placing them in direct heat or sunlight, as this could cause the paint to crack or fade.
Proper Storage
Store your sneakers in a cool, dry place to prevent fading and cracking. Keeping them in a bag or box can help protect them from dust and moisture. If you’ve customised the shape or added 3D elements, consider using shoe trees to maintain the structure.
From Start To Finish: How Long the Process Takes
When you’re customising sneakers, the time you’ll need to spend on the project can vary quite a lot depending on the complexity of your design and the drying times between each step.
A straightforward customisation can take a few hours, while more detailed work may extend over several days, especially when factoring in drying times. It’s definitely worth properly planning each step and taking enough time to get it right to ensure professional, long-lasting results.
Here’s a rough breakdown of how long each stage might take for an average project:
Preparation (Cleaning & Prepping)
Properly preparing your sneakers, including cleaning and stripping any old finishes, typically takes around 30 minutes to an hour. This is an essential step to ensure the paint adheres well and lasts. However if your sneakers are particularly dirty or damaged, this step might take a little longer.
You should also account for the time taken for your sneakers to dry completely if you’ve got them wet while cleaning. It’s usually best to leave them to dry naturally, which can be anywhere from 12-48 hours depending on the conditions and temperature.
Painting or Dyeing
Applying the paint or dye itself very much depends on the level of detail in your design. For simple, single-colour applications, the process is quicker and can usually be completed within around 1-2 hours.
Intricate designs or multiple colours require more time and attention, with highly detailed hand-painted designs potentially taking several hours. If you’re using multiple colours or layers, you may need to wait until one layer of the paint is completely dry before adding more detail over the top.
Drying Between Coats
Drying time is crucial for achieving a smooth finish and can’t be rushed. Each layer of paint or dye should be allowed to dry for at least 1–2 hours before applying the next coat. For complex designs with multiple layers, plan for additional time.
Finishing & Sealing
Once all your paint layers are dry, applying a sealer and allowing it to set is the final step. This is usually fairly simple to apply, taking around 15–30 minutes, plus an additional drying period.
Once sealed, we’d recommend letting the sneakers dry completely for at least 24 hours before wearing them to ensure the paint or dye is fully set.
Common Mistakes To Avoid When Customising Sneakers
Customising sneakers can be a rewarding process, but there are some common mistakes people make that can impact the final result. Here’s what to watch out for to ensure a smooth process and high quality finish:
Skipping Proper Preparation
One of the biggest mistakes is neglecting to prep the sneakers before painting. Failing to clean and strip any old finishes from the leather can prevent the paint from adhering properly. Always take the time to thoroughly clean and prep the surface for the best results.
Applying Thick Layers of Paint
Applying paint too thickly can lead to cracking or uneven coverage. Instead, apply thin, even layers, allowing each coat to dry before adding the next. This will help achieve a smooth, flexible finish that lasts.
Not Allowing Enough Drying Time
Rushing through the drying process can cause smudging and uneven textures. Make sure to let each layer dry fully before moving on to the next step. This is especially important when using multiple colours or adding fine details.
Using the Wrong Type of Paint
Not all paints are suitable for leather and flexible materials like sneakers. Using general-purpose or household paints can lead to peeling and cracking. Always choose high-quality leather or acrylic paints designed for flexibility. We’d recommend brands that make products specifically for this type of project such as Angelus Leather Paint or Jacquard Neopaque Paint, for durable and long-lasting results.
Neglecting to Seal the Paint
Without a proper sealant, custom designs are vulnerable to wear, scuffs, and even moisture damage. Applying a clear sealant designed for leather surfaces after painting helps protect your design and gives it a professional finish.
FAQs About Customising Sneakers
Q: Is customising sneakers suitable for beginners?
A: Yes! With a little patience and the right tools, anyone can customise their sneakers. Starting with simpler designs can help build confidence and help you nail your technique before moving onto more complex projects.
Q: Is customising sneakers legal?
A: Yes, customising your sneakers for personal use is perfectly legal. However, selling customised sneakers with copyrighted logos, particularly if you have changed or adapted logos, or used images or other intellectual property without permission may infringe on copyright laws.
Q: Can I use regular acrylic paint on sneakers?
A: It’s best to use leather-specific or flexible acrylic paints, as regular acrylics can crack or peel on flexible surfaces like sneakers.
Q: Do I need to seal the paint after customising?
A: Yes, sealing the paint is strongly recommended for durability. A clear sealer protects your design from wear, moisture, and scuffs.
Q: How long should I wait before wearing my customised sneakers?
A: Allow at least 24 hours for the paint or dye to fully set before wearing. This ensures the finish is durable and long-lasting.
Q: Can I remove the paint if I make a mistake?
A: Yes, mistakes can be corrected if the paint is still wet by gently wiping it off. For dried paint, you may need a leather-safe paint stripper to remove it carefully.
Q: How do you stop paint from cracking on leather?
A: To prevent cracking, apply thin, even layers of paint and allow each layer to dry fully before adding the next. Using a flexible leather paint and sealing the design with a clear coat will also help maintain durability.
Q: Will the paint come off or fade over time?
A: If treated with care, correctly painted shoes should last for a long time. High-quality paints like Angelus Leather Paint or Jacquard Neopaque Paint, are designed to be flexible and long-lasting when applied properly. Sealing the paint also helps prevent cracking and fading. Watch out for things like sun exposure, water and dirt building up on the surface during wear, which can all impact the finish over time.
Q: Can I use these techniques on other materials, like canvas or rubber?
Yes, some leather paints and dyes work well on other surfaces. Be sure to choose a paint that’s compatible with the material you’re working with or get in touch with us for help finding what you need.
How Will You Customise Your Sneakers?
Whether you’re refreshing an old pair of sneakers or customising them with a unique design, using leather dyes and paints is a great way to breathe new life into your shoes. With a bit of care and attention, and the right preparation and techniques, you can achieve long-lasting, professional-looking results.
If you're thinking about reviving your sneakers, don’t hesitate to try out some colours and designs that inspire you. While more complex designs require a little more work, the process is fairly straightforward and gives you a chance to get creative while giving your shoes a fresh, updated look.